Centralized Management Server 101
I’ve used Central Management Server registered servers in SSMS for primarily one purpose, saving connections. :-) This is definitely not the intended usage. As I’ve explored the benefits of using this a little more, I put a few notes together to help share the concepts I came across. I was brand new to this feature in SQL server, and found some of the functionality pretty powerful, especially if you are in an environment that has a lot of servers to manage and ensure consistent configuration among all of them.
Moving CMS Entries to a new CMS server
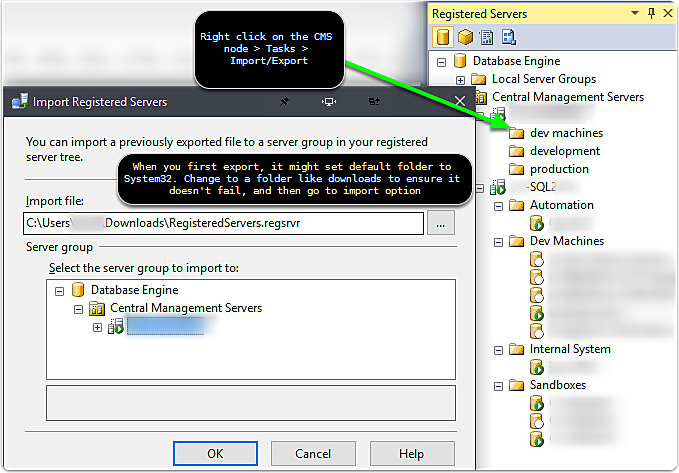
If you need to move your Central Management Server (CMS) entries to a new CMS, then use the export and import functionality located under the CMS > Tasks context menu.
Run queries across multiple instances at once
Right click on the CMS group and choose new query. This tab will now execute the same query in parallel across all the selected instances, allowing quick adjustments. One creative use of this is to register two databases in the server group, then click new query. They could be on the same server if you wish. Once you start a new query on this group you could run the same query on two separate databases with no extra effort. An alternative to using this is Red Gate’s SQL Multiscript which offers a bit more customization in the behavior and project file saving for multi-server, multi-database query running. You can identify a multiserver query at the bottom identified by
Highway to the danger zone
It’s easy to forget you are running a server group query. Use some type of visualization and don’t leave the query window open longer than you need to, especially in a production environment. One hint can be setting up the Red Gate tab color if you have SQL Prompt. You can see the connection details on the tab are a little different, listed with the CMS server group name + database, such as the image below
Create a policy
In reviewing technet article on Policy-Based Management
Administration Functionality
From the CSM context menu you can perform some nice functionality such as start, start, restart of SQL services, view error logs, and even pull up the SQL configuration manager for that instance! Take advantage of this to easily adjust settings across instances without having to log into remote machines.
Policies
There are a few different types of policy behaviors to know about. From MSDN article Administer Servers by Using Policy-Based Management I found that there were a few ways the evaluation of a policy is handled.
- On Demand
- On Change: Prevent
- On Change: Log Only
- On Schedule One interesting comment from MSDN indicating that: “IMPORTANT! If the nested triggers server configuration option is disabled, On change: prevent will not work correctly. Policy-Based Management relies on DDL triggers to detect and roll back DDL operations that do not comply with policies that use this evaluation mode. Removing the Policy-Based Management DDL triggers or disabling nest triggers, will cause this evaluation mode to fail or perform unexpectedly.”
Create Policy
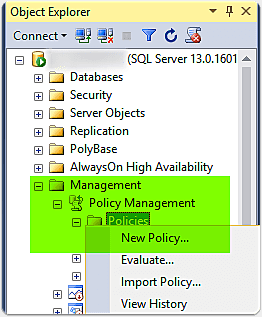
This suprised me a little. The policy functionality wasn’t available in the CMS registered server tab. Instead, go to the server in Object Explorer and expand Management > Policy Management > Policies
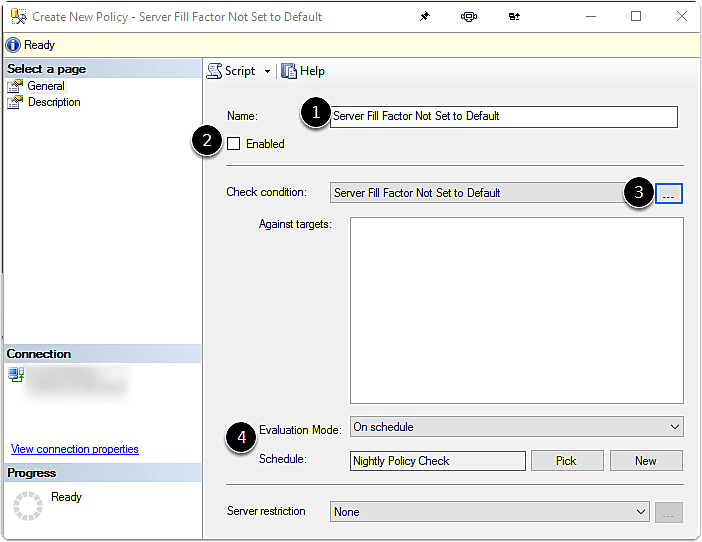
creation dialogue
Add new condition, there is a large list of policies to evaluate. You can detailed information on them on MSDN here.
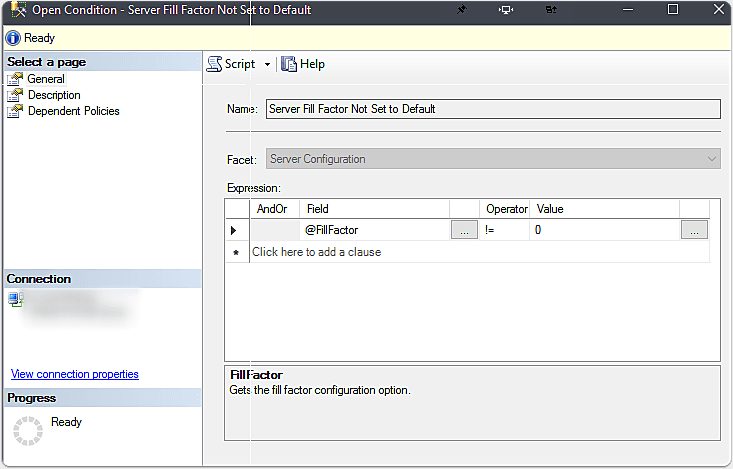
Configure the rules
You’ll see a huge list of Facets to evaluate and then you can easily setup logic to evaluate this.
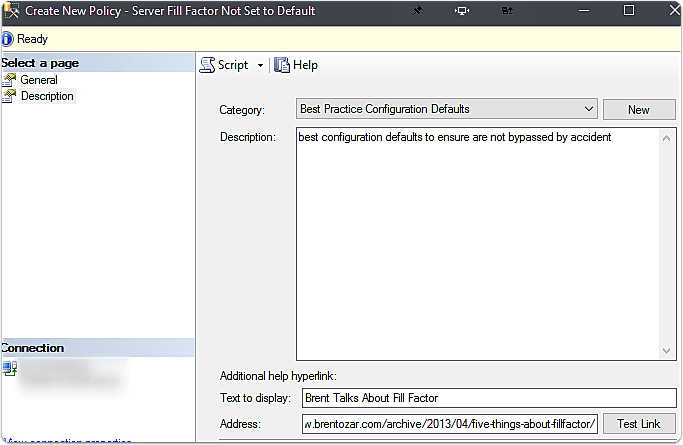
Description Details on Policy
In this case, I linked back to my favorite resource for server configuration… the Ozar! Providing some detail back on this could be great for quickly providing details later back to someone reviewing the results.
All your hard work
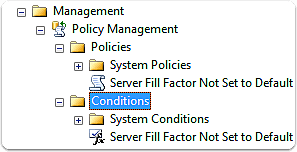
For all this hard work, you’ll get two fancy new icons in object explorer. With this work, I’m thinking saving your policies for backup with scripts would be a great idea…. scripting this would be much faster than all these steps to check one setting. I wish the dialogue had been focused on setting up multiple conditions quickly instead of all that work for a single Fact to be evaluated.
Evaluate Policy Results
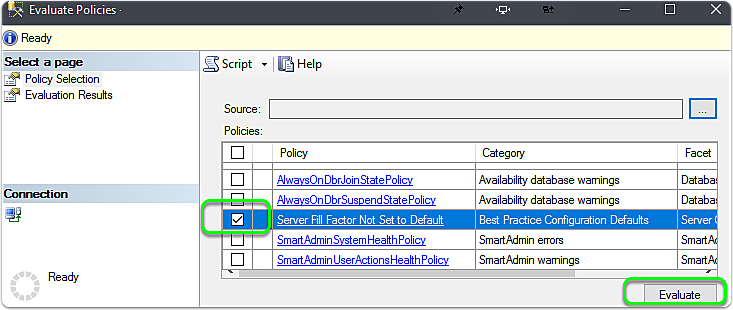
Start the evaluation
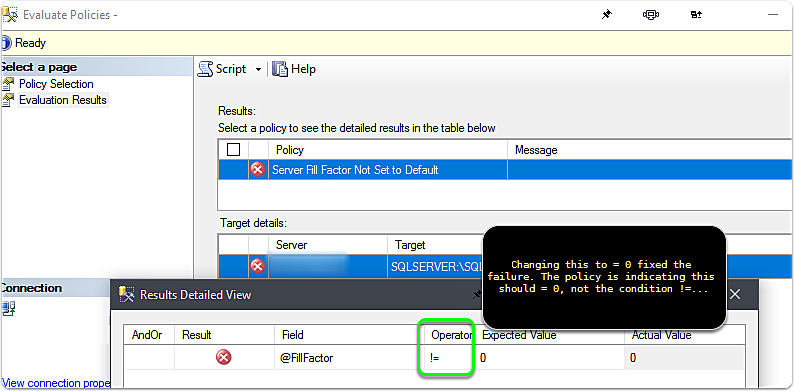
Results were not what I expected
My first run gave me a failure, despite to my eyes being the right match. I had to change my approach from being @FillFactor != 0 to being Policy should be @FillFactor = 0 and it would pass, else it would fall. I was thinking in reverse. MSDN indicates to be aware that: IMPORTANT! The functions that you can use to create Policy-Based Management conditions do not always use Transact-SQL syntax. Make sure that you follow the example syntax. For example, when you use the DateAdd or DatePart functions, you must enclose the datepart argument in single quotes.
Prebuilt Best Practice Rules
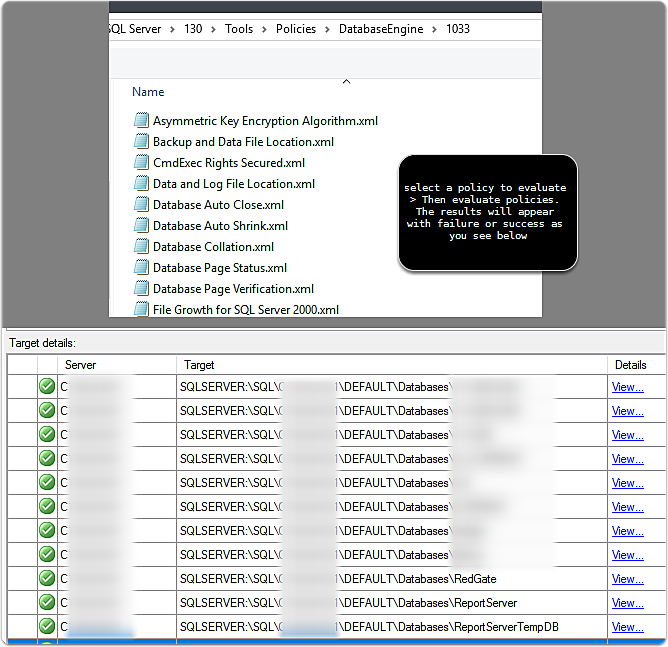
Thankfully, I found that there were a lot policies already presetup by Microsoft. The default location I had for the 2016 installation was C:\Program Files (x86)\Microsoft SQL Server\130\Tools\Policies\DatabaseEngine\1033 . You can navigate to these by right clicking on the Server Group you want to evaluate, and then Evaluate Policies > Choose Source > Files > SQL Server Best Practices folder > Database Engine > 1033 > Rule to explore
Some final thoughts
I can see the value for enforcing policies across a vast number of servers, and monitoring for compliance. For my environment, primarily dealing with a lot of developer sandboxes, the effort this requires is a bit too much. For my scenario, I’ll probably stick with some home grown queries, powershell SMO checks, and the awesome OmniCompare tool that is getting better and better each iteration. A previous article I wrote discussed the functionality of this tool here: OmniCompare: A Free Tool to Compare SQL Server Instances

Webmentions
(No webmentions yet.)